
“Nausicaä of the Valley of the Wind” is an animated film by Japanese animator Hayao Miyazaki.
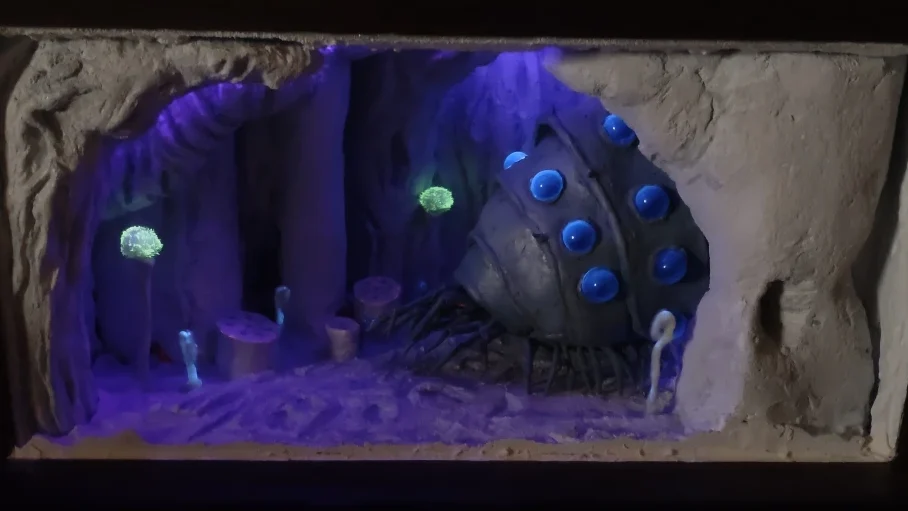
I created a figurine of the Ohmu (a giant insect-like creature featured in the film) and turned it into a diorama of the Toxic Jungle .
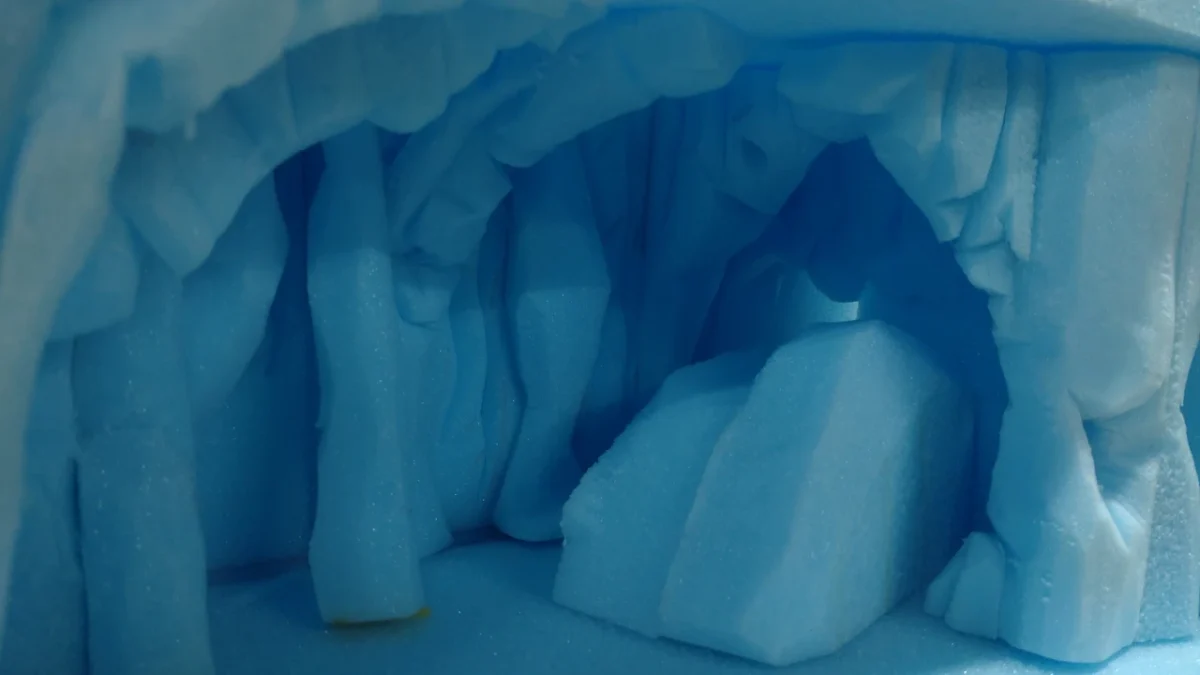
The scene I created features an Ohmu on a path it made while moving through the Toxic Jungle, eating plants along the way—a moment depicted in the story.
The piece was handcrafted using stone clay, mortar, and polystyrene foam. I incorporated black light LED strips into the Sea of Corruption to make the fluorescent paint applied to the piece glow.
1.Creating the Toxic Jungle
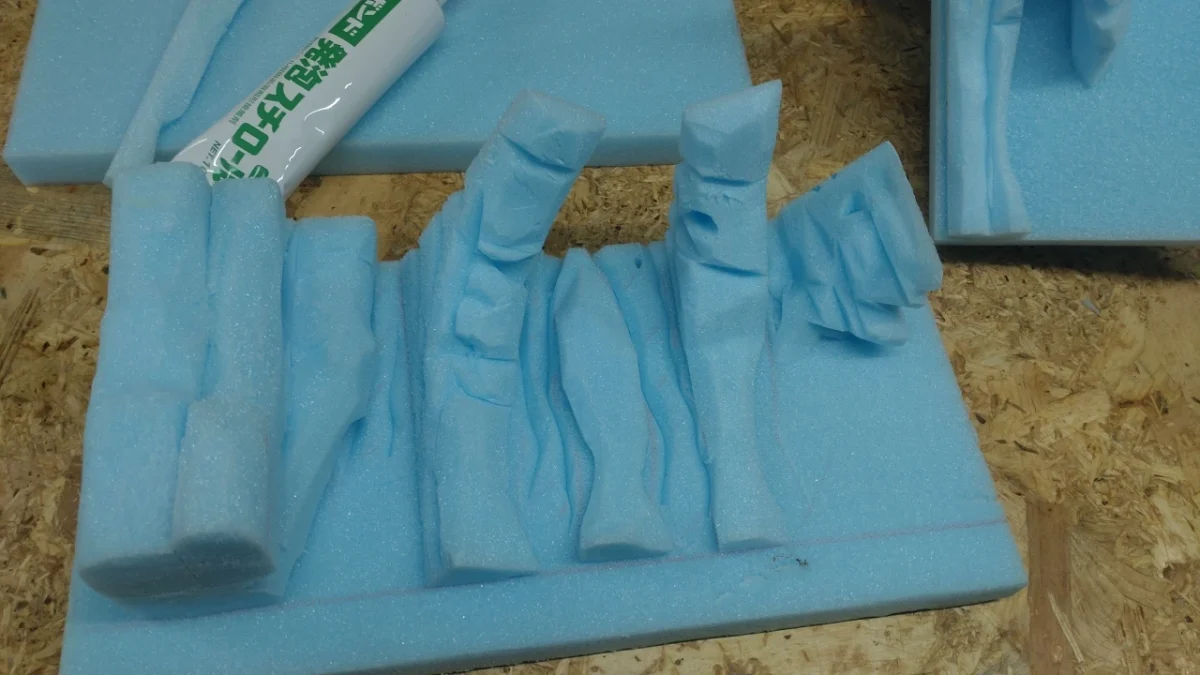
First, I decided on the general size and carefully cut the polystyrene foam. I began by assembling it into a box shape to plan how to arrange the Toxic Jungle plants.
The “Ohmu’s Path” refers to the trail left behind as the Ohmu consumes the plants while moving forward through the Toxic Jungle.
I chose a curved path from the very beginning of the design process. By partially concealing the layout instead of fully exposing it, I hoped to create a diorama with a sense of movement and depth.
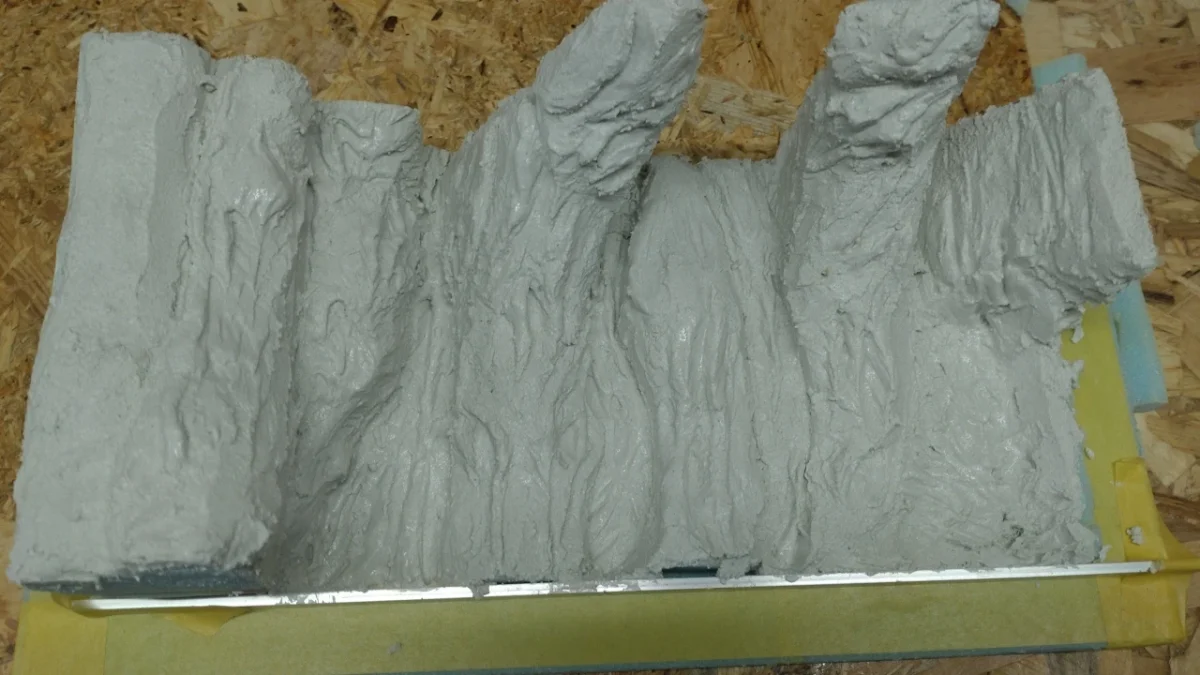
Simply leaving the walls of the box flat wouldn’t capture the right atmosphere. To add depth and reduce any sense of artificiality, I carved grooves and uneven textures into the walls to mimic plants and terrain within the Toxic Jungle.
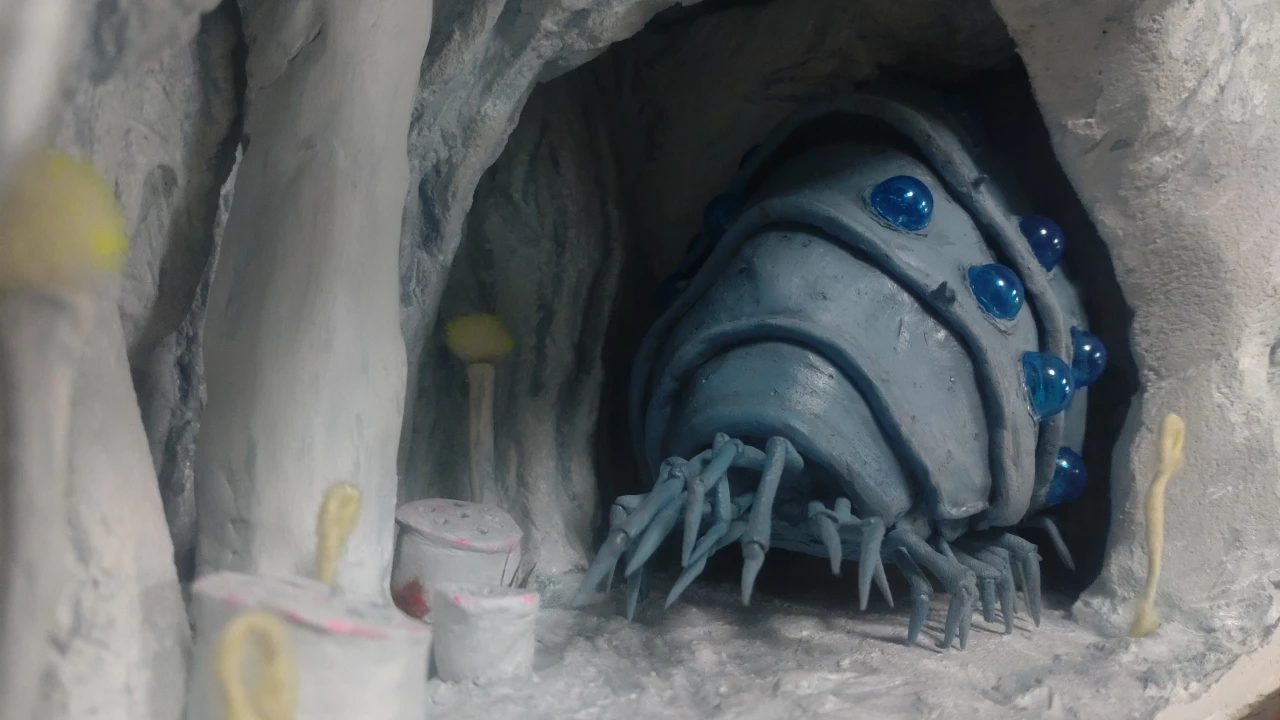
The Ohmu’s body is only partially visible—about a quarter of it remains hidden. To enhance this effect, I attached slanted protrusions above the embedded segments to suggest openings or holes. With these elements in place, the foundation of the corridor is nearly complete.
Applying mortar to the roughly shaped styrofoam that had already been coated with a sealer.
2.Crafting the Ohmu’s Eyes
I used scraps of polystyrene foam as placeholders for the Ohmu to check the size and overall layout impression before moving forward with the project.
Once I had a rough idea of the Ohmu’s scale, I began crafting its fourteen eyes.
Rather than searching for objects of the perfect size, I decided it would be faster to shape them myself. I created a jig and used a heat gun to form hemispheres out of clear PVC, which I then used for the eyes.
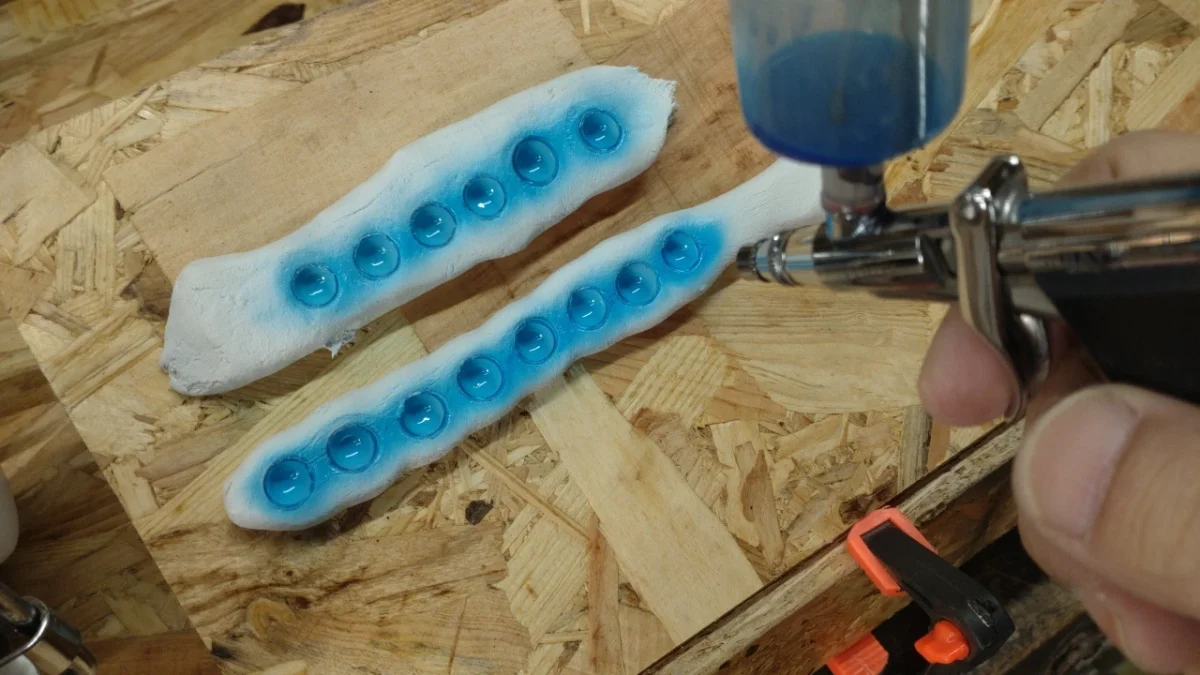
Spraying fluorescent paint on the inside of the hemispherical eyes.
To avoid getting paint on unintended surfaces, I embedded the hemispheres into paper clay. This both secured them in place and prevented overspray from reaching the outer surface. Ideally, I would have used regular clay, but paper clay was the only option available at home.
3.Crafting the Ohmu with Stone Clay
I took portions of stone clay, shaped them roughly by hand, and attached them piece by piece to form the outer shell.
However, instead of creating a base by coating the polystyrene foam, I started the process by directly placing thin layers of clay onto the foam. This made securing the clay more challenging.

The eyes are attached to the third layer of the outer shell, so after placing it, I used a round rod to press and position them precisely.
The Ohmu’s eyes consist of 14 hemispheres in total, attached to the third and fourth layers of the shell. However, the fourth layer overlaps the others at the top. Because of this, after attaching the third layer, I worked backward, placing the remaining shell layers from the rear and finishing with the fourth layer.
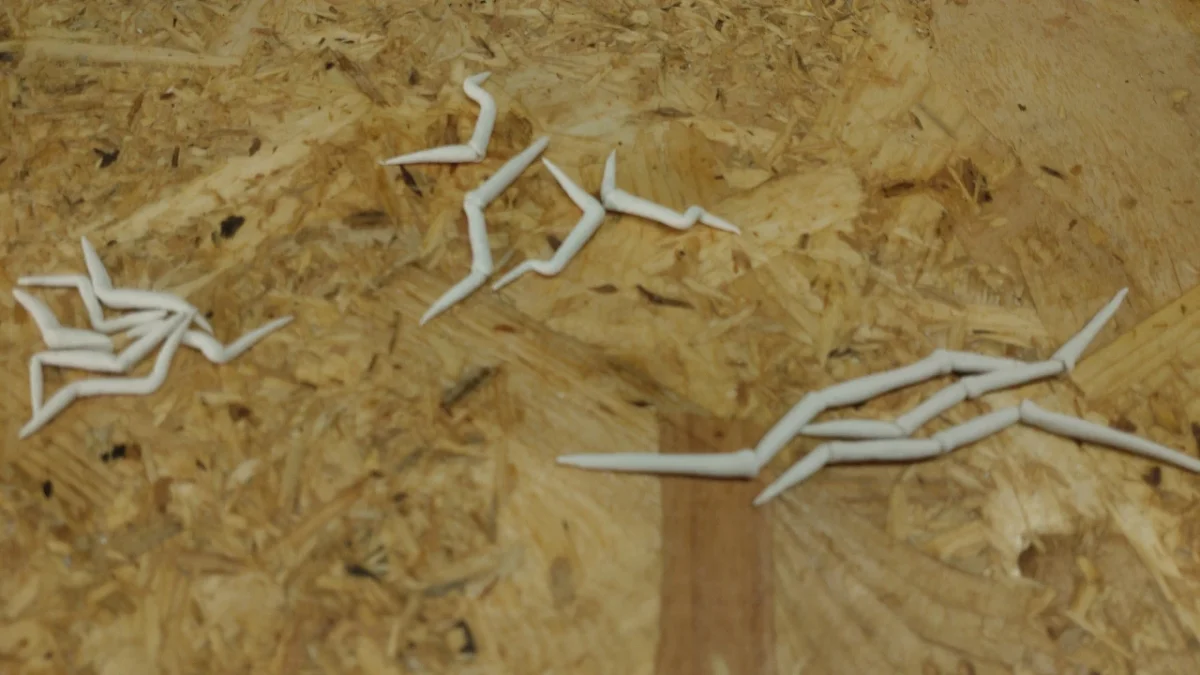
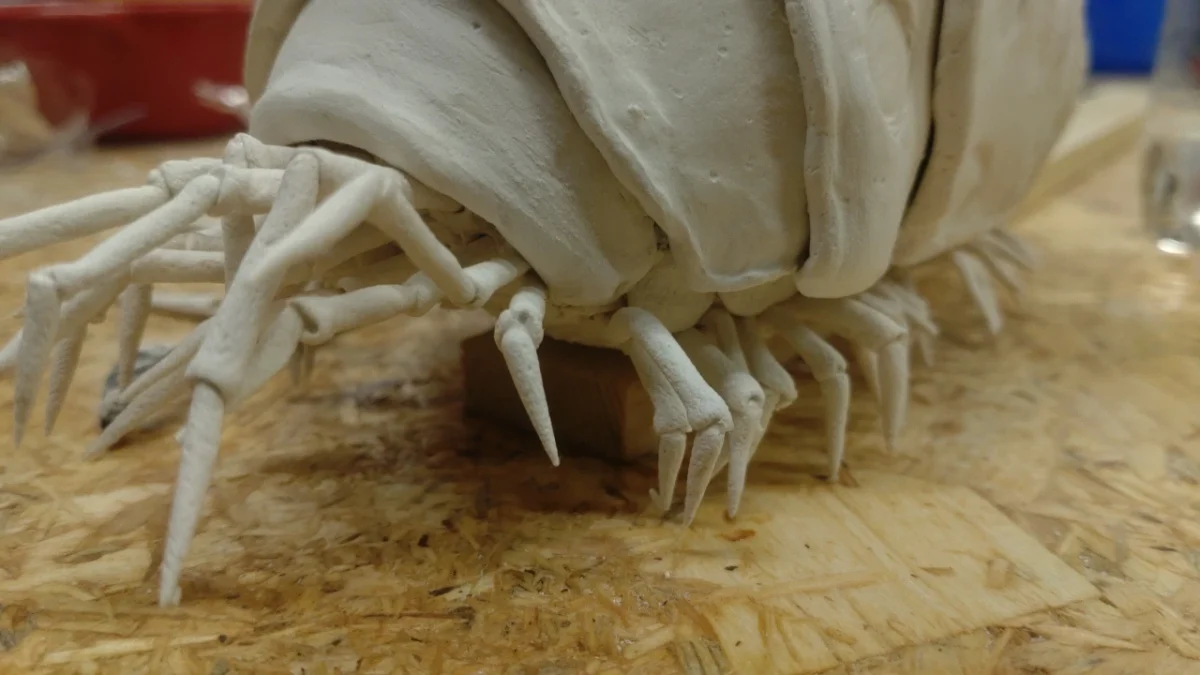
The countless legs were made by portioning stone clay into appropriate sizes, rolling them out by hand, and shaping them on coarse sandpaper to create detailed surface textures.
I crafted each segment individually, lightly applying wood glue to assemble them piece by piece.
For the front legs, I created multiple variations with different lengths and joint angles, intending to adjust and fit them during the assembly process.
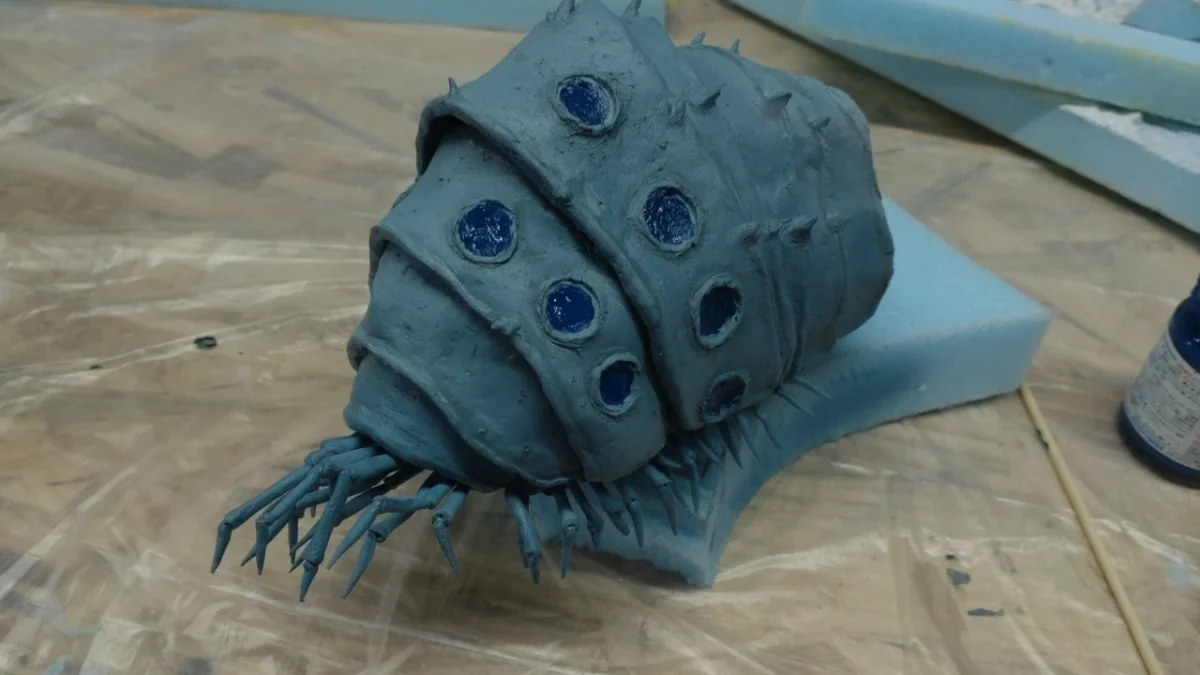
The paint used for spraying consisted of only four colors: white, black, blue, and brown. These were mixed to differentiate the Ohmu and the Sea of Corruption.
For shaded areas, I used slightly darker tones of blue or black than the main body, lightly applying them with a brush. I then blended the effect further by spraying over it again.
Once the painting is complete, I attach the hemispherical eyes to the Ohmu.
5.Assembly of Parts

To embed LED strips that emit black light, I carved grooves into the polystyrene foam that would serve as the ceiling.
The wiring was installed inside and embedded into the case, with the power supply USB designed to be removable.
After completing the painting of the Sea of Corruption and the Ohmu, I set the LEDs into the box. Once all the parts were assembled, the display was complete!
Thank you for reading.